
Here’s How to Add Dynamic Reviews to Elementor
Before we begin, make sure that the JetEngine and JetReviews plugins are installed and activated on your website.
Step 1: Create Your Review Type
Log in to your WordPress dashboard, where you will see a new entry > JetReview. Please make sure you have successfully installed and activated the JetReview plugin beforehand.
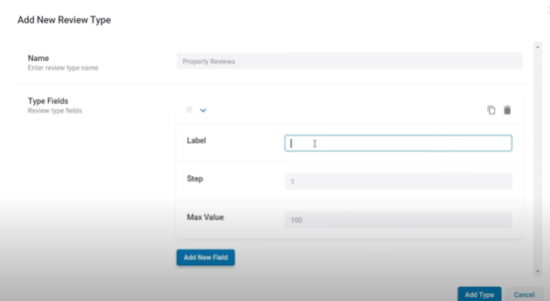
- Go to JetReview > Review Types > Add New > Name your review (e.g Property reviews).
- Next, Add New Field, this will be a dropdown expandable menu that you will be able to populate.
- Label > E.g, Price >Steps: Step 1 > Max value: 5
- Copy your first field and then populate the field with new Label details just like you did before, e.g facilities might be your next label.
- Once you are done creating your labels you can proceed to clicking on Add type.
Step 2: Configure Your Settings
Next go to JetReview > Settings. It is important to configure your settings, this allows you to associate your review type to your post type. Don’t worry about posts and pages right now. You will notice that they are disable in your settings.
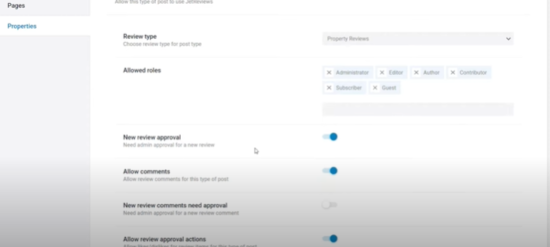
- Go to Properties > Review Type > Property Reviews
- Next, go to Allowed roles > E.g Admin, Editor, Sub-editor, Guests, Contributor.
- New review approval > Enable
- Allow comments > Enable
- New review comments need approval > Disable (optional)
- Allow review approval actions > Enable (optional
Step 3: Select Your Template
Move to Elementor Pro theme builder, you will find this entry in your dashboard under Elementor Pro. Here, you will see all the theme templates. This is where you will allow people to add their own comments and ratings.
- Go to Default Property Single > Edit with Elementor> Search for review in the widget search bar > Review listing > Drag and drop on to your page.
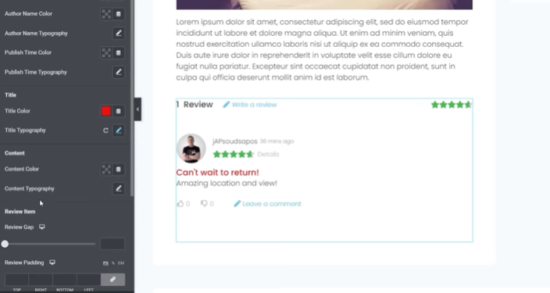
- On the left hand side of your page you will see the Settings tab. Where you will be able to format and style your review, e.g headings, Icons, review rating etc. You can even go ahead and change the size of the review, size of the fonts displayed on your page.
- Then go ahead and Update.
Step 4: Managing Comments
Go back to the WordPress dashboard. If there is a specific comment a user left that you would not like to be displayed. You can go ahead and delete it. Here’s how:
- JetReviews > Comments > Actions > Delete
Step 5: Adding Star Ratings to Your Archive Templates
To do this you will need to move from JetReviews to JetEngine > Listings.
- JetEngine > Listings > Property Listing > Edit with Elementor.
- Search Widget > Rating > Star Rating > Drag and Drop into your page.
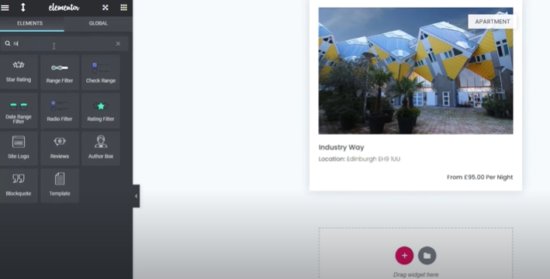
Now, style as desired, just as you have done for the original rating and click Update. This will complete your product and site review process.