- Go to http://apps.pixlr.com/editor/
- Choose Open File from Computer
- Choose a photo that is at least 600px wide by 400px tall and Open
- If your image is larger than 600×400, click on Image Image Size and type 600 into the width box. The height should constrain automatically. Click OK
- Adjust the zoom to 100% in the preview at top-right or use your mouse-wheel to zoom in
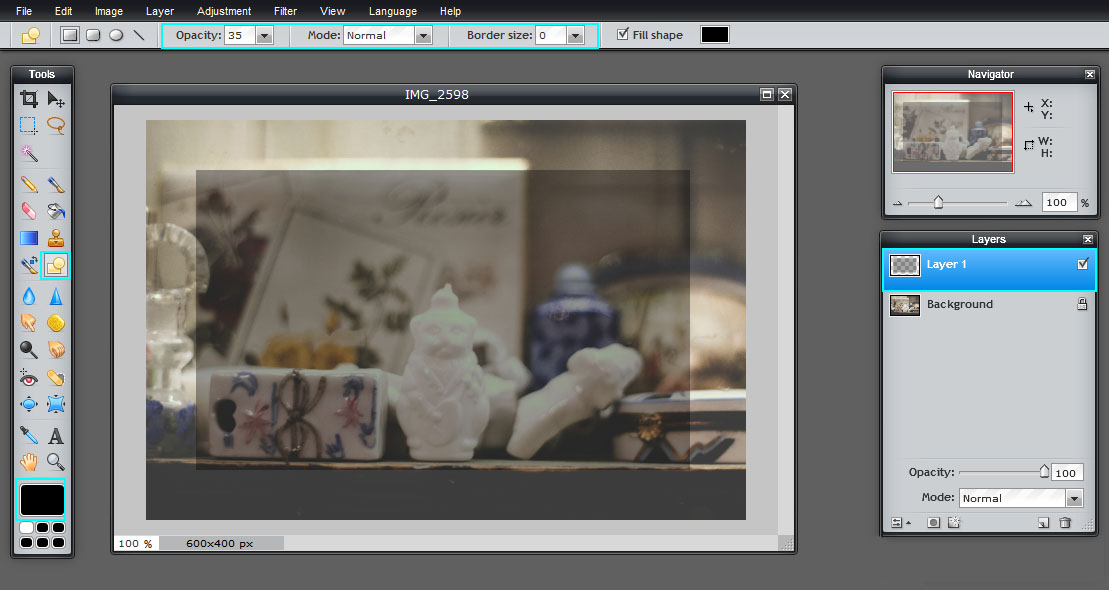
- Choose Layer → New Layer from the top menu. You should notice a new layer appear in the Layer box on the right.
- Select the Drawing Tool in the left-hand toolbar
- Turn the Opacity down to 35 in the tool options just below the menu bar and set the Border to 0.
- Click the color swatch block at the far right of the options bar to choose a color, if desired.
- Draw a rectangle in the center of your photo
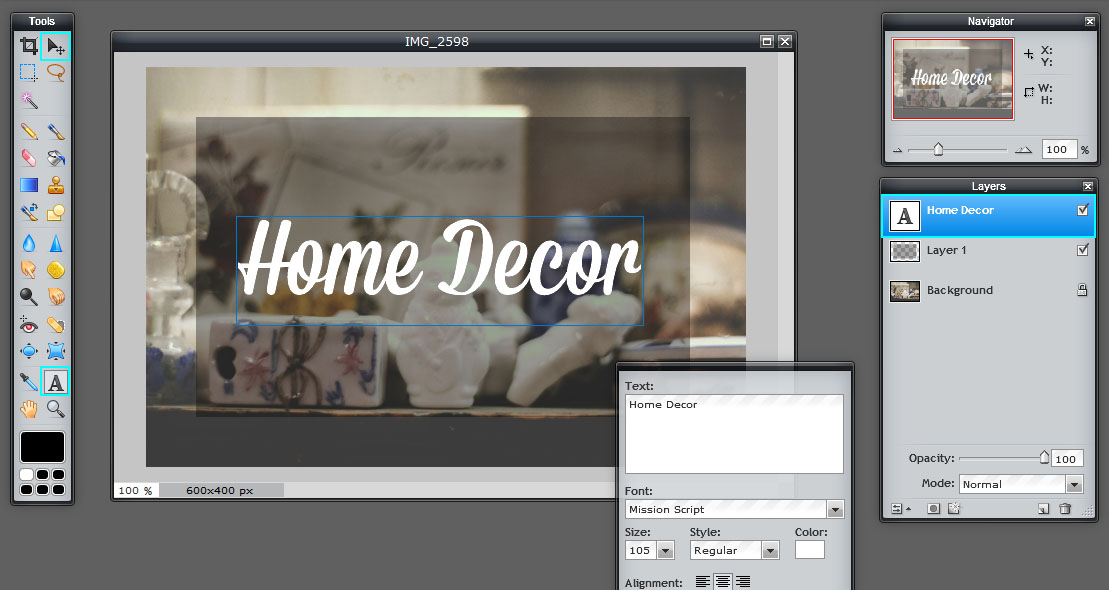
- Choose the Text tool in the left-hand toolbar and click where you want the text to begin. This will create a new layer for you and popup a little text box.
- Type your desired text, adjust the size and color, then choose a font and alignment.

- Fonts are loaded from your computer. You can test and download several free fonts at Google Fonts or FontSquirrel
- If you need to adjust the placement of your text, choose the Move tool (top right) and drag the text into position
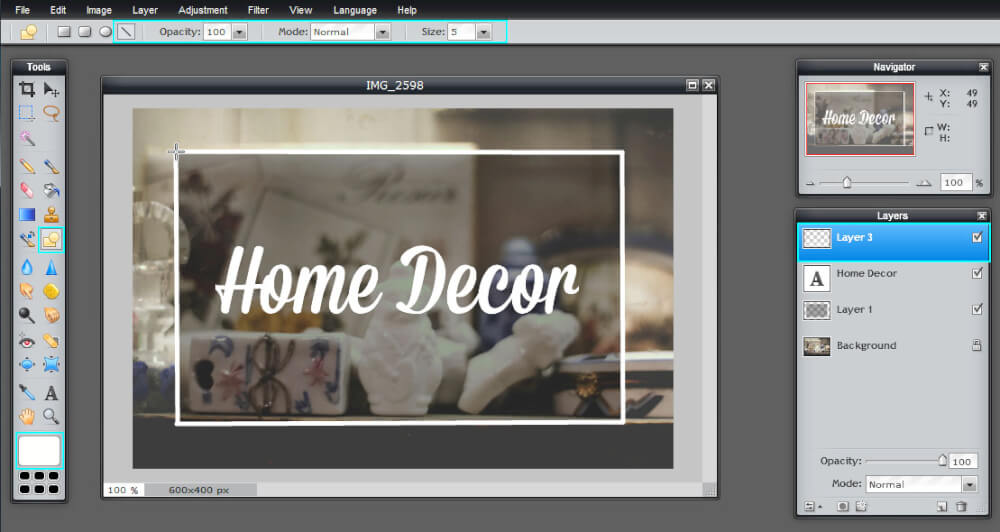
- Choose Layer → New Layer from the top menu. You should notice a new layer appear in the Layer box on the right.
- Click the color swatch at the bottom of the toolbar (the black rectangle) and select a border color
- Select the Drawing tool again
- Choose the line shape in the top options bar, set the opacity to 100 and the size to 5
- Draw a border around your semi-transparent box.
- That’s it! Choose File Save, give your image a name, then save it to an easy to find location.
- Set the image as your Product Category Thumbnail (Products > Categories) or your post or page Featured Image.
- For Product Category images, enable this image to appear at the top of your category archives under Theme Options in the Category Image option.